Next Level Setup™ Library – Get Started
Always start with a clean neck pocket to achieve the best and most accurate results with your precision Giraffe™ Neck Pitch Angle Gauge and Full Neck Pocket Shim System. Check the heel of the neck for obstructions or protrusions that would affect the accuracy and well being of the guitar.
Many manufacturers or previous owners use a somewhat random and variable approach to adjust the action and neck setup. You might find a variety of materials in the neck pocket that prevent it from being flat; excess paint, business cards, cardboard, sand paper, etc. You need to ensure that the neck pocket is clean and free of obstructions in order to use the Neck Pitch Angle Gauges, so they are easily inserted and removed from the neck pocket without damaging the gauges or the guitar.
A few words of advice: Don’t Fear the Neck!
If you’re not sure how to perform this relatively easy clean up function, or need more information on how to remove the neck, check and clean the neck pocket and check the heel of the neck, please check our library of video tutorials, pictorials and written instructions.
If, after reviewing the instructions and video documentation, you feel these steps are beyond your skill-set or level of confidence, take your guitar to a qualified guitar tech, a reputable shop, or professional luthier, who can perform the work.
Giraffe™ and Giraffe Technologies are not responsible for any damage or injury from the use or installation of our products.
Giraffe™Neck Pitch Angle Gauge and Full Neck Pocket Shim System are Manufactured to be the Highest Quality and be of Utmost Precision.
Each Giraffe™ product is designed to fit the Original Equipment Manufacturer (OEM) specifications. There should be no need to trim or modify a Giraffe™ Gauge or Shim on an OEM guitar. A “copy” guitar may or may not have the same dimensional quality as the OEM. Giraffe Technologies tests its products on a range of “copy” guitars to ensure a range of fits. Occasionally, the neck screw attach hole locations differ and may require minor trimming of the Gauge if the screw holes are drilled too close to the neck pocket in the guitar’s body.
Giraffe™ Gauges are precision tools and should be treated as such. Never force a Giraffe™ Gauge into a neck pocket. Inspect and clean the pocket prior to attempting to insert any gauge. Typical problems can be found in the installation instructions in this library of videos and documented tutorials.
Step-by-Step Instructions: Using Giraffe™ Neck Pitch Angle Gauges for your Next Level Setup™
Giraffe™ Neck Pitch Angle Gauges (NPAG) allow you to adjust the pitch angle of the guitar neck without having to remove the neck from the guitar body. Installation and removal of the gauges is easy and the following instructions will show you how to do it. We’ve included written instructions, pictorials and video documentation (with transcription) to help you achieve your Next Level Setup™!
Please start by watching the short video NPAG Proper Handling Demo above. This short video will provide you with the proper handling of your precision Giraffe™ Neck Pitch Angle Gauges to avoid damage.
Always start a new Next Level Setup™ with a clean neck pocket!
NPAG Installation – Step #1
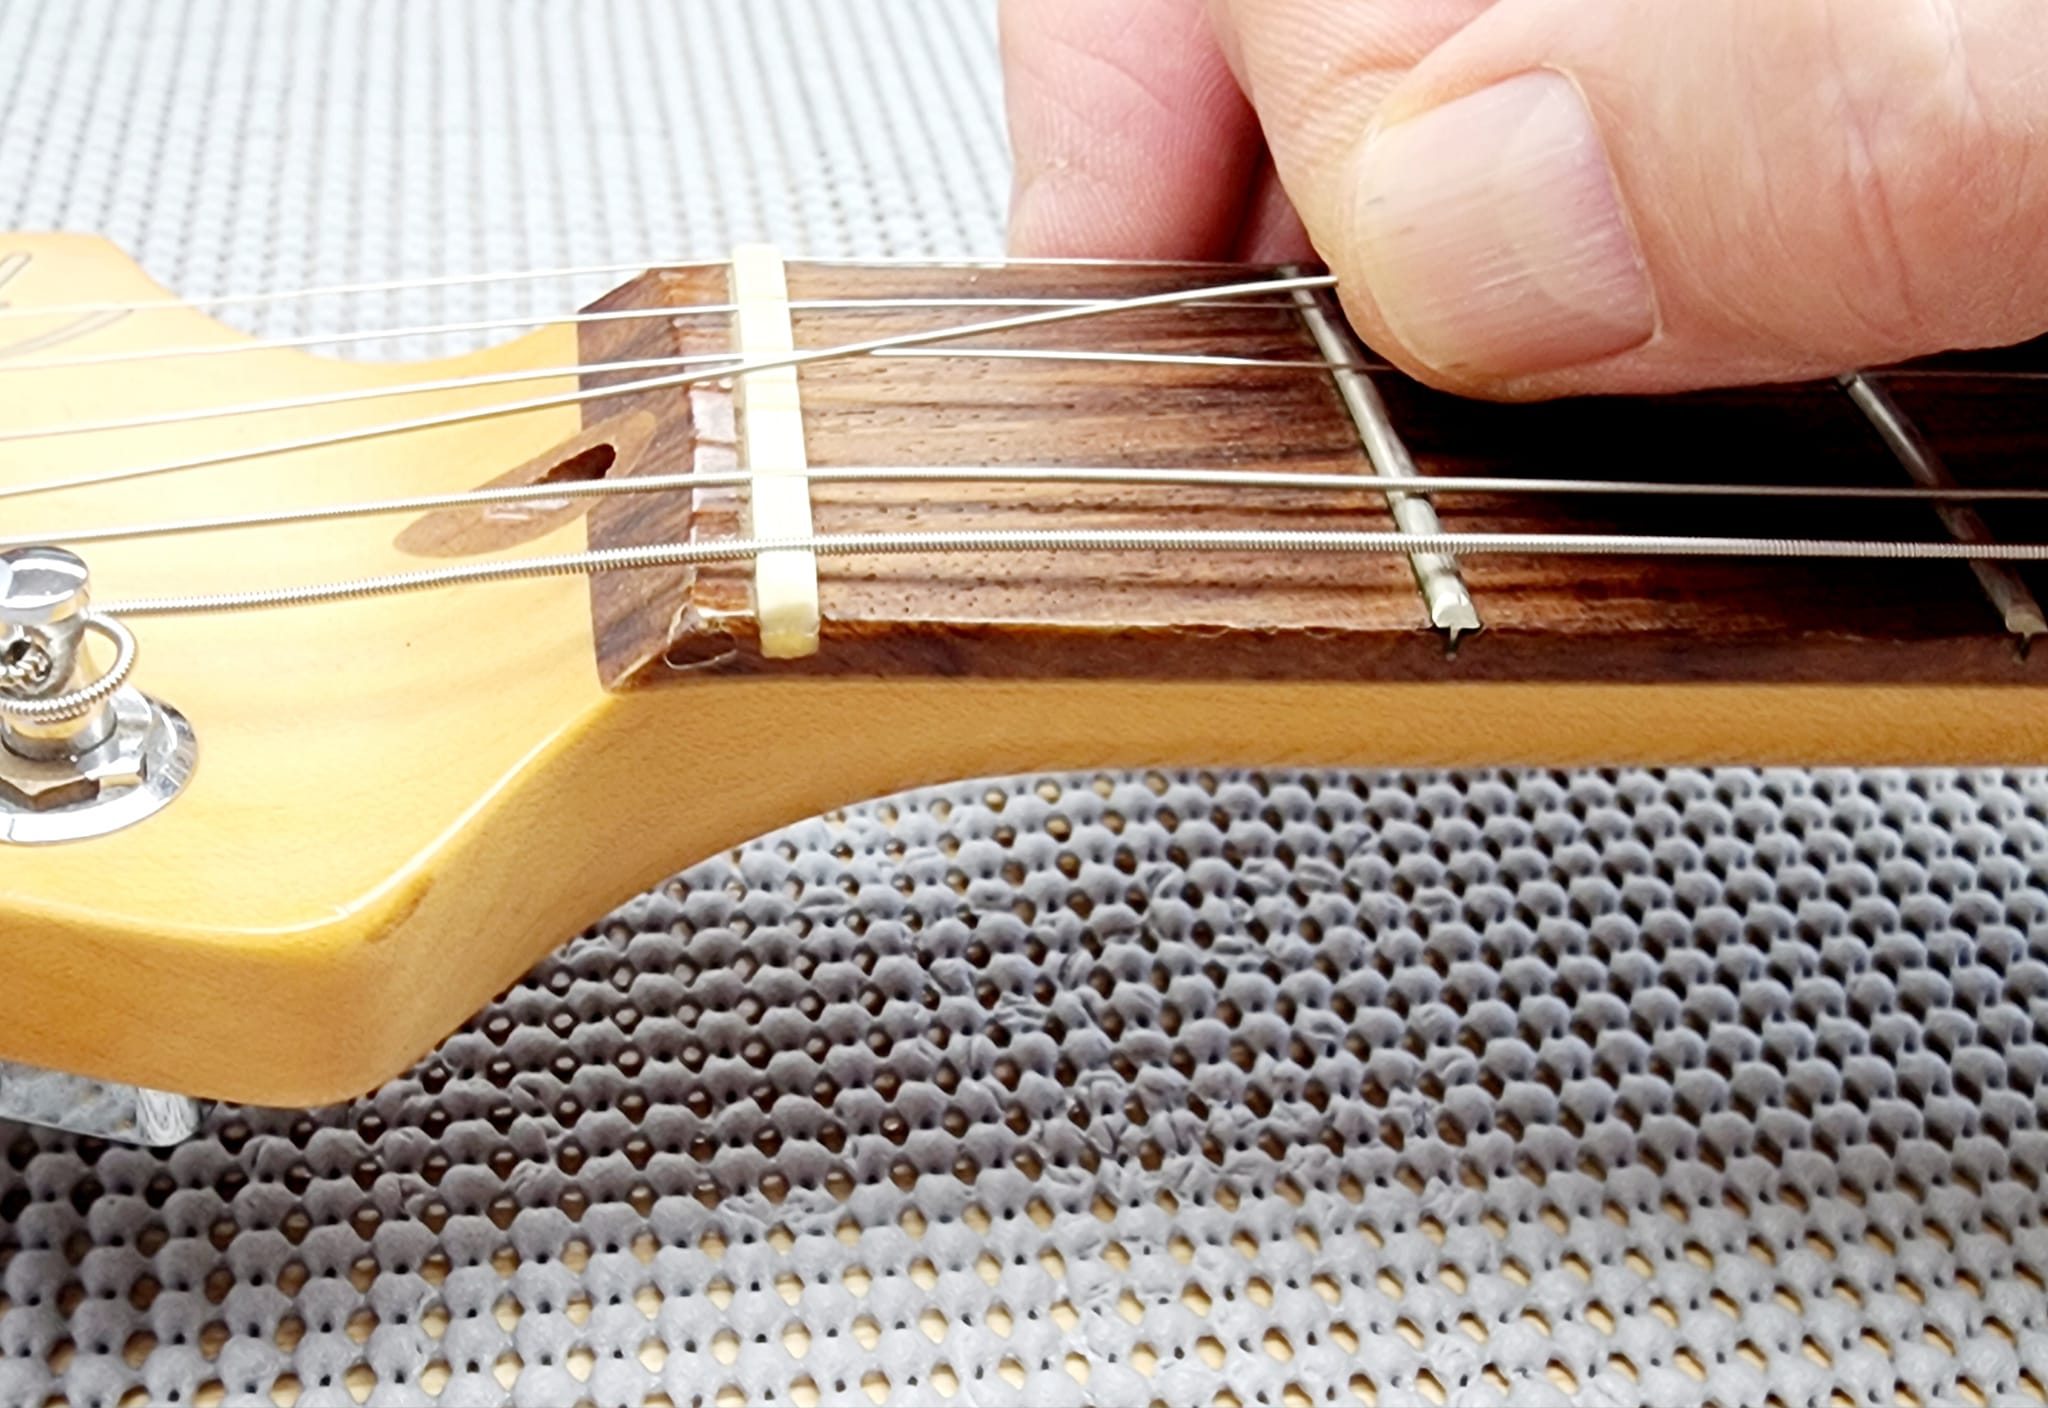
- Loosen the strings of your guitar to fully take off the tension. There cannot be ANY string tension on the neck.
- Test each string to make sure you’ve released the tension by lifting each string out of its slot in the nut. You want just enough slack in the string to allow the insertion and removal of the gauges without the possibility of damaging your guitar or having a string snap and cause injury. See below photo as example.
- The strings should be just loose enough that you can insert the gauge/s and quickly re-tune the guitar to pitch.
NPAG Installation – Step #2
- Turn your guitar over so the back of the guitar and the plate that holds the neck attachment screws is facing up. Place the guitar in a vertical position with the back facing toward you and the head stock pointing up. Place the end of the guitar body on a table, chair or on your thigh.
- Using the appropriate tool loosen the neck attach screws. Typically, this is a Phillips Head type screwdriver. You only need to turn the neck attach screws just enough so the neck will move enough to open a small gap between the neck pocket and the heel of the guitar. 2 to 2 ½ full turns should be enough. If you can jiggle the back plate, it’s loose enough and you’re ready for Step #3.
NPAG Installation – Step #3
Keep the guitar in the vertical position. Hold the guitar by the body. Using your thumbs, lightly press the heads of the neck attach screws. The neck attach screws and the clearance holes in the body act as guides for the neck when it moves. Shift the neck a small amount so that it moves away from the pocket bottom surface.
Select the Giraffe™ Gauge you want to start with. Holding by the tab, insert the gauge tongue into the neck pocket of the guitar. The slots in the tongue will engage the neck attach screws. If there is any force required or resistance upon installing the gauge. Remove the gauge completely. Turn the gauge over to the other side and try again. You can also ensure that you have enough gap. For the gauge to clear all the way through the body, just press the neck attached screws to move them. If necessary, loosen the neck attach screws another ¼ to ½ turn.
Once the gauge is fully inserted you will feel it bottom out. Keeping the guitar in the vertical position. Place your palm on the Fingerboard fret board of the guitar. Press the neck back into pocket lightly. Tighten the neck attach screws. Do not over tighten the attach screws. Overtightening the screws risks stripping the screw hole in the neck heel. The screws are a woodscrew being screwed into wood so please use good judgement on how much torque you apply to each screw.
You can now retune the guitar, adjust bridge saddles, string height and test the action height. At Giraffe™ we prefer to start with a straight neck, establish the neck pitch angle with Giraffe™ Gauges, adjust the saddles for string height and test the action height by playing the guitar before setting any neck relief. Neck relief is dependent on the playing style and techniques, action height preference, gauge of the strings and what area of the fretboard is played the most.